Hi friends! Just wanted to show you my last two weeks’ watercoloring effort! I finished it today! I also signed up for classes in August, as practice and learning never go to waste! I hope you like my picture and as always, thanks for checking in!

Hi friends! Just wanted to show you my last two weeks’ watercoloring effort! I finished it today! I also signed up for classes in August, as practice and learning never go to waste! I hope you like my picture and as always, thanks for checking in!
Hey all! Well, I’ve had two sessions in my beginners watercoloring class and am finding it a lot of fun! I must admit that I tried to learn on my own, i.e., using books and videos, but I find learning in person, with an instructor, is so much better! The artist instructor has been doing mixed media for 40+ years and knows her stuff! Fortunately, she is also very kind, patient and encouraging of her students! Anyway, below are my two “masterpieces” (fruit from class 1 and desert/mountain scene from class 2). I have a ways to go, but I’ll continue the classes and practice, practice, practice! Thanks for stopping by!


Hello my very few followers! I can’t believe it’s been since October 2013 since I posted anything! And now it’s July 2014! I guess I got too wrapped up in everyday life and didn’t find time to do some crafting ~:o( Well, that’s changing a little as lately I’ve been real interested in learning to paint with watercolors! Lindsay in Maine, this is where you come in! Your YouTube vids and blog have inspired me so much! I signed up for a beginners watercolor class at one of our parks and rec centers starting next week! I think the socializing part will be fun as well!
In the meantime, I have been practicing painting with photos I have taken and what I have learned by watching countless videos on YouTube. Here is a pictre I took of the Grist Mill in Sudbury, Massachusetts, and then my watercolor rendition….oops, other way around!
I do hope you like it and thanks for checking it out! I’ll be sure to update after my class starts…..till then…..love and hugs!

Hi everyone! It’s been a while since my last post, so I thought I better get crackin’ since I received a request from my BFF Stephanie that she’d like to see some “craftiness!”
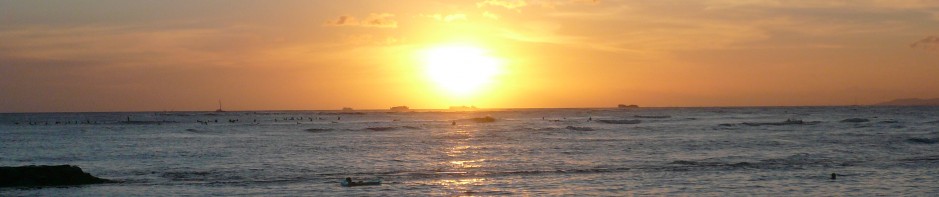
And what a better way to get started than to pull out (from many years past) my collection of sea (beach) glass and pottery/ceramic shards from my visits to Rockport and Plymouth, Massachusetts and Sunset Beach on Oahu, Hawaii! There may be some other beaches involved, but heck if I remember them! A few photos below show my beach “treasures.” The only things missing are my many shells and driftwood!


So Stephanie, here you go………..I bought a soldering tool and materials to use on the ceramic/pottery pieces, which I am still practicing using, so it may take a while until something photographable turns out. I have been researching, on YouTube, videos on soldering for beginners and there have been quite a few that have been very helpful. Our friend, The Frugal Crafter (http://thefrugalcrafter.wordpress.com), Lindsay, up in Maine, has a great soldering video!! She is so entertaining, as well as talented in her many crafting skills. Hope you don’t mind, Lindsay, that I put in a plug for you?! Check it out folks!
Well, I did make a necklace with a piece of my sea glass and a couple of “ocean” related charms. The necklace is pictured in my sea glass photo above, but here is a close-up of the necklace. I’m very happy how it turned out!

That’s it for now, folks! Lots more jewelry to make! Any positive feedback would sincerely be appreciated! Thanks for stopping by! Luv and hugs, M.
Turn them into ornaments, of course! As promised, here are four more decorated, Texas-size, acorns. These will look cute on someone’s Christmas tree! I left my messy, painted hand in the pic so you can see just how big these acorns are! Hope you like them!


Products used:
Hey, if you have any other suggestions for what I can do (be nice, now) with the rest of my supply of acorns, I would appreciate the feedback! Thanks for stopping by! ……..Luv…..M
Wouldn’t it be nice if we all had sweet dreams, all the time? I watched an How-To video on You-Tube, by vickypgr, blog: http://www.clips-n-cuts.com/2013/09/stamptember-blog-hop/, on making a dreamcatcher card using stamps and die-cuts. Loved it……check it out! Here is my version…….

Products used:
I had to make my own leaf shape template for the center of the dreamcatcher, as I didn’t have any dies or stamps for the size I needed. I also added a few gold links to the top of the dreamcatcher, in case the recipient of this card would like to hang it up. I think it turned out OK!
Thanks for stopping by and be sure to check out vickygpr’s video if you would like to make a dreamcatcher, too! Sweet dreams, Luvs!
Happy Friday peeps! Last night I posted my golden acorn project…….I will be posting more on acorns, only slightly different. But for now, it is yet another card! or two, or three…….keeping with the MFW theme, this is my card………

Honey is golden! The inside reads, “hope your special day is as sweet as can bee!” I may just have to give this card to my “honey” because he is so patient/tolerable of my crafting/card making!
Products used:
Hi everyone! A few more hours ’til TGIF! For some, it’s already Friday! Hip, hip, hooray! I was just playing around at my craft table today and decided to make something a little different. It could be made into a greeting card, but I decided it was going to be an ornament. I haven’t figured out how it’s to be mailed/posted yet, but then again, I don’t know who I am going to send it to, either!
You may have heard the saying (in the USA, anyway) that everything’s bigger in Texas?! It’s absolutely true! My neighbors have this beautiful oak tree in their yard, and it yields the biggest, fattest acorns I have ever laid eyes on! I marched right over there and asked, politely, if I could gather them, because surely they could be used in something “crafty.” I have a huge zip-top bag full of them!! Yay me!
So, in following along with the MFW challenge “All That Glitters is Gold,” I rolled one in Versamark and fine gold embossing powder and voila……a beautiful, golden, Texas-size acorn! OK, now what am I going to do with this beautiful acorn? Then I thought back, way back, when I lived in Massachusetts (fall is extraordinary there), and my son was in 1st grade. His class put on a little concert for their parents, and one of the songs they sang was, “Tall Oaks, from Little Acorns, Grow.” At least that’s how I remember it! It was a sweet song sung by little first graders….lump in my throat…..moving on……..
I added a little eye hook and some burlap twine to spiff it up and hung it from my computer-generated and die-cut card front. Using “Delight” paperclay and mixing in some Rangers “walnut” distress stain, I rolled out, woodgrain background stamped, and cut out a trunk shape of an oak tree with a few inked and punched oak leaves as embellishments. So anyway, here is my card and thanks for reading all my babble…..after a while I think I would sound like Charlie Brown’s teacher…..WAH, WAH, WAH, WAH, WAH!!

Stay tuned for another creation…..till then……Ta-Ta!
Yay!! Due to the Labor Day holiday weekend I still have time to participate in the Moxie Fab World, Tuesday Trigger, Honoring Ombre! I love ombre! I could just eat up that inspiration piece of cake, all layers and the butterfly! It’s so purple-ly!

Since it is after Labor Day, and so close to Fall, I decided to create a card using, what else(?), falling leaves! I used my Copics, YR04, YR07, YR12, YR24 and YR31, to create the ombre effect for the leaves on my card. Since I used a maple leaf hole punch, I had to strategically place them to show the ombre effect. Fortunately, most of the leaves are raked up and put into the basket (stamps by Judith)! I used my Inktense watercolor pencils to color the basket. The yellow, orange and brown cardstock is from Gina K., and I used Sakura Gelly Roll Metallic pens for my "Happy Fall" lettering. Drum roll, please…….here’s my card……..

Well, I really hate to let go of Summer, but I know it will return next year and Fall is the start of renewal for next year……out with the old and in with the new! So thanks for dropping in……..I hope you have a wonderful week…….until next time…….tootles….M
Hi everyone! Happy Friday! Last week at this time I was tuning into “Stamp-a-Faire,” hosted by Papertrey Ink. Yesterday, during some free time, I decided to practice one of the techniques I learned, “Scent-sationals – Scratch and Sniff.” Here is the cute card I came up with using Unsweetened Kool-Aid grape, orange and cherry (mixed with clear embossing powder) as my ‘scratch and sniff’ aromas…….

What a FUN technique! I just love the stamp set “bubblegum4me” from “The Stamps of Life,” which I purchased at the CK Scrapbooking Convention in Tulsa, OK, last Friday! Perfect for this technique! The possibilities are endless! Other materials used are:
That’s it for today! Hope you like my card. Feel free to leave some feedback! I hope to have a few different craft posts in the near future, so please stayed tuned! Have a great and fulfilling weekend! Luv, M

